The Complete Brake Inspection and Service Guide for Fleet Trucks
General Truck Repair
A disciplined fleet truck brake inspection culture turns unpredictable brake issues into predictable maintenance. When you standardize measurements, document adjustments, and replace components before they snowball, you protect drivers, cargo, and margins.
Whether you’re running air brakes, hydraulic brakes, or a mix, the fundamentals don’t change: confirm condition, compare to spec, then correct. Use this fleet truck brake inspection guide to build a process your techs can repeat every time.
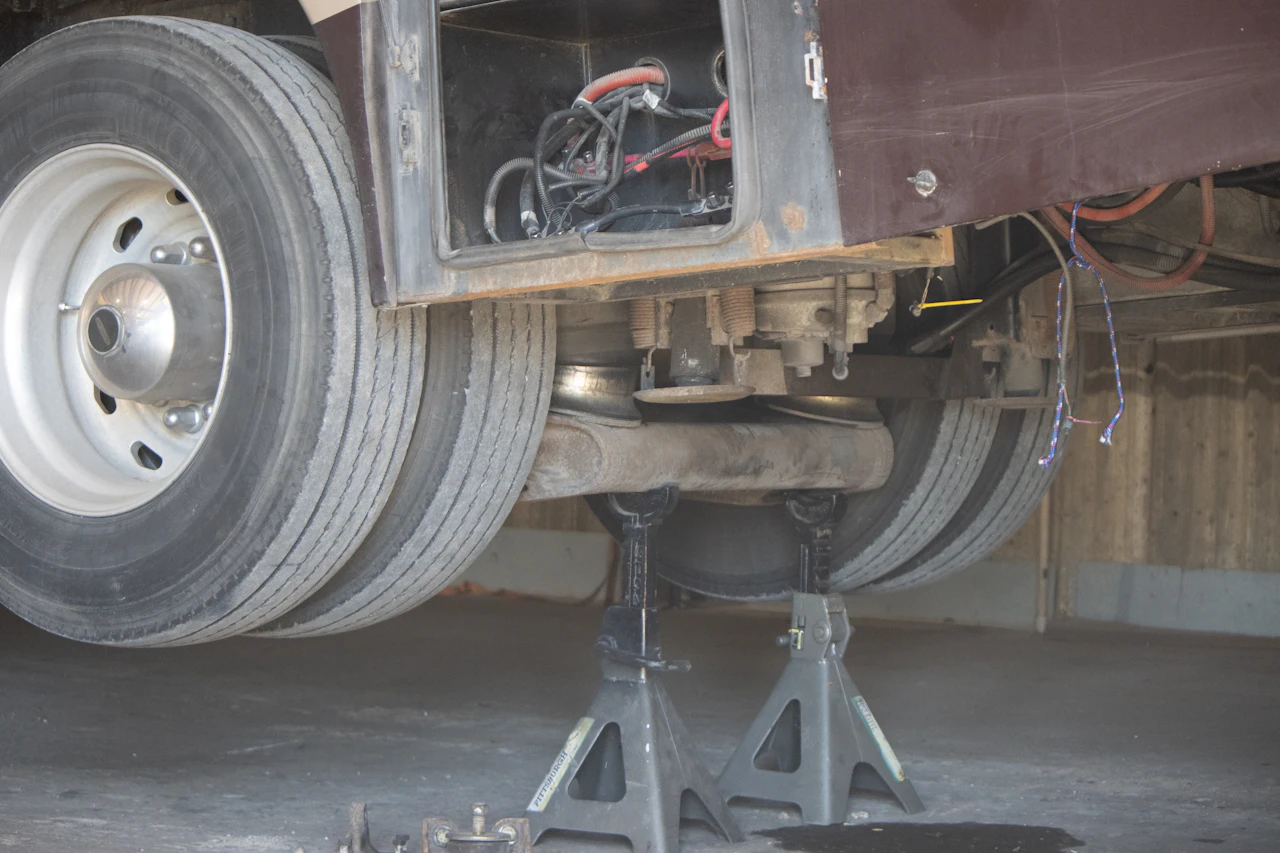
Start at the Wheel Ends—Linings, Drums, and Hardware
Every fleet truck brake inspection begins with a visual inspection of the components that meet the drum. Measure brake lining thickness at multiple points; tapered or uneven readings hint at seized hardware or off-center shoes. Inspect drums for heat checking and cracks. It can reduce the contact area.
Verify hardware condition—return springs, anchor pins, retainers—and check backing plates for grooves that misguide shoe travel. Close with a wheel seal and bearing sweep; leaks and play contaminate brakes and tank stopping power, undermining the entire fleet truck brake inspection effort.
Air brake systems
For air-equipped units, fleet truck brake inspection rises or falls on adjustment and component wear. With brakes released and then fully applied, measure brake chamber stroke and compare to the chamber’s size chart; out-of-spec stroke means weak force and longer stops.
Verify the function of air brake slack adjusters (auto or manual): seized adjusters, dry clevis pins, or incorrect lengths all create an imbalance side-to-side. Pull dust shields and inspect S-cam bushings; sloppy bushings twist the cam, wedge shoes unevenly, and cook one lining while the other barely works. Service the air system upstream—dryer, purge valve, and tanks—because wet air corrodes valves and changes the “feel” your drivers count on during a fleet truck brake inspection road-test.
Service decisions: Repair vs. Replace
Good fleet truck brake inspection doesn’t stop at “bad/good”; it frames the smartest repair. Replace linings in axle sets to preserve balance; mixing new and nearly worn shoes breeds pull. When drums exceed discard or show heat checking plus measurable drum runout, replace—machining often leaves them too thin for heat load.
ABS/ESC diagnostics—lights off, data on
Modern fleets need ABS that actually works, not just dash lights that wink at you. During every fleet truck brake inspection, scan for stored faults, check each wheel-speed sensor air gap, and inspect tone rings for rust jacking or broken teeth. Harness chafe near suspension travel points is common; repair, secure, and protect with loom. On road-test, confirm the ABS lamp proves out and extinguishes; intermittent lamps often track to loose connectors or borderline sensors. Clean ABS data shortens stopping distances on sketchy pavement and prevents nuisance stability interventions that spook drivers—another win for your fleet truck brake inspection program.
Quick-reference wear limits and telltales (clipboard this)
- Brake lining thickness below spec or oil-soaked shoes indicates immediate service.
- Blue/purple drums flag overheating and possible drum runout.
- Excess brake chamber stroke or non-functioning air brake slack adjusters lengthen the stopping distance.
- Slop in S-cam bushings creates uneven shoe contact and hot spots.
- Cracked hoses, aged belts (air compressors), or wet tanks point to upstream problems.
Driver Feedback Turns Inspections Into Accuracy
A great fleet truck brake inspection respects what drivers feel. Pull comments into the RO: soft pedal, pull under light braking, or pulsation at highway speeds, each point somewhere specific. Train drivers to note lamp behavior at key-on and during ABS events; “sometimes on” means “always inspect.” Encourage post-service feedback after the first route back—early, real-world notes catch settling issues fast. When drivers and techs share a language, your fleet truck brake inspection stops being a checklist and starts being a system.
Common Pitfalls (And How to Avoid Them)
- Greasing slack adjusters without confirming the auto-adjust function—masking a deeper fault.
- Reusing glazed drums after new linings—hello, reduced friction and longer stops.
- Ignoring small air leaks—compressor overwork leads to hot air, wet tanks, and valve wear.
Two-minute road-test routine after the bay work
- Verify straight, hands-off stops from 30 mph; any drift suggests imbalance or drag.
- Listen for a rhythmic scrape or thump that tracks wheel speed—common with drum runout.
- Trigger a safe ABS event to confirm sensor response and lamp behavior.
- Coast, stop, and IR-gun drums; a hot outlier flags a dragging brake.
Quick, repeatable drives let your fleet truck brake inspection translate into real-world confidence.
Schedule A Heavy-Duty Brake Program
Ready to lock in consistent stopping power and fewer citations? Build your fleet truck brake inspection program around measurements, documentation, and timely component replacement. At Saviors Repair, we blueprint air and hydraulic systems axle by axle, correct the root causes, and road-verify the fix. Put your fleet on a safer, smarter brake rhythm—book your inspection and service plan today. For more information about brakes, read our article on common brake maintenance mistakes.
Contact Saviors Repair Today!
Contact UsRelated Articles
.webp)
7 Winter Brake Maintenance Tips Every Truck Driver Should Know
Winter weather can strain your truck’s braking system even in mild climates, making seasonal brake maintenance critical for safety and reliability. These winter brake maintenance tips help truck drivers prevent failures, improve stopping performance, and stay compliant no matter where winter driving takes them.
The Ultimate Guide to Preventing Diesel Truck Breakdowns in Winter
Cold snaps expose weak coolant, tired batteries, wet air systems, and marginal filters. A smart plan for preventing diesel truck breakdowns in winter keeps engines starting, brakes crisp, cabins warm, and deliveries on schedule across Pearland’s wet mornings and quick temperature swings.
.webp)